Deep Dive into iOS Automation at Grab - Continuous Delivery
This is the second part of our series “Deep Dive into iOS Automation at Grab”, where we will cover how we manage continuous delivery. The first article is available here.
As a common solution to the limitations of an Apple developer account’s device whitelist, we use an enterprise account to distribute beta apps internally. There are 4 build configurations per target:
Adhoc QA - Most frequently distributed builds for mobile devs and QAs whose devices present in the ad hoc provisioning profile.
Hot Dogfood - Similar to adhoc QA (both have debug options to connect to a staging environment) but signed under an enterprise account. This build is meant for backend devs to test out their APIs on staging.
Dogfood - Company-wide beta testing that includes both the online and offline team. This is often released when new features are ready or accepted by QA. It can also be a release candidate before we submit to the App Store.
Testflight - Production regression testing for QA team. The accepted build will be submitted to the App Store for release.
The first 3 are distributed through Fabric. The last one is, of course, distributed through iTunes Connect. Archiving is done simply through bash scripts. Why did we move away from Fastlane? First of all, our primary need is archiving. We don’t really need a bunch of other powerful features. The scripts simply perform clean build and archive actions using xcodebuild. Each of them is less than 100 lines. Secondly, it’s so much easier and flexible for us to customize our own script. E.g. final modifications to the code before archiving. Lastly, we have one less dependency. That means one less step to provision a new server.
Server-side Swift
Now whenever we need a new build we simply execute a script. But the question is, who should do it? It’s clearly not an option to login to the build machine and do it manually. So again, as a whole bunch of in-house enthusiasts, we wrote a simple app using server-side Swift. The first version was implemented by our teammate Paul Meng. It has gone through a few iterations over time.
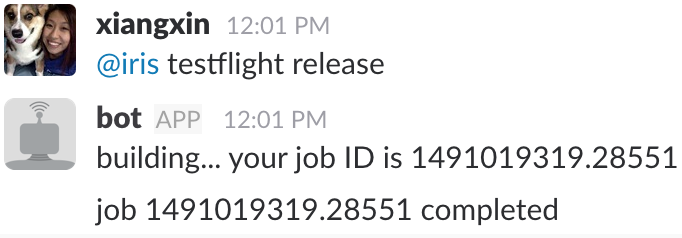
The app integrates with SlackKit using Swift Package Manager and listens to the command from a Slackbot @iris. (In case you were wondering, Iris is not someone on the team. Iris is the reverse of Siri 🙊. We love Iris.)

Irisbot is a Swift class that conforms to messageEventsDelegate protocol offered by SlackKit. When it receives a message, we parse the message and enqueue a job into a customised serialised DispatchQueue. Here are a few lines of the main logic.
func received(_ message: Message, client: Client) {
  // Interpret message to get the command and sanitize user inputs...

  // Schedule a job.
  archiveQueue.async {
    // Execute scripts based on command.
    shell("bash", "Scripts/\(jobType.executableFileName)", branch)
    // Notify Slack channel when job is done.
    client.webAPI.sendMessage(channel: channel, text: "job \(jobID) completed",
  }

  // Send ACK to the channel.
  client.webAPI.sendMessage(channel: channel, text: "building... your job ID is \(jobID)", ...)
}
Now if anyone needs a build they can trigger it themselves. 🎉
 Literally anyone
Deployments
We sometimes add new features to @iris or modify build scripts. How to deploy those changes? We did it with a little help of Capistrano. Here is how:
The plain Iris project looks like this:
├── Package.swift
├── Package.pins
├── Packages
├── Sources
│   └── main.swift
└── Scripts
Additional files after Capistrano look like this:
├── Gemfile
├── Gemfile.lock
├── Capfile
├── config
│   ├── deploy
│   │   └── production.rb
│   └── deploy.rb
└── lib
    └── capistrano
            └── tasks
Iris doesn’t have a staging environment. So simply config the server IPs in production.rb:
server 'x.x.x.x', user: 'XCode Server User Name'
And then a set of variables in deploy.rb:
set :application, "osx-server"
set :repo_url, "git@github.com:xxx/xxxxx.git"
set :deploy_to, "/path/to/wherever"
set :keep_releases, 2
ask :branch, `git rev-parse --abbrev-ref HEAD`.chomp
append :linked_files, "config.json"
linked_files will symlink any file in the shared/ folder on the server into the current project directory. Here we linked a config.json which consists of the path to the iOS passenger app repo on the server and where to put the generated .xcarchive and .ipa files. So that people can pass in a different value in their local machine when they want to test out their changes.
We are all set. How simple is that! To deploy 🚀, simply execute cap production deploy.
Screwed up? cap production deploy:rollback will rescue.
Conclusion
What Grab has now, isn’t the most mature setup (there is still a lot to consider. e.g. scaling, authorisation, better logging etc.), but it serves our needs at the moment. Setting up a basic working environment is not hard at all, it took an engineer slightly over a week. Every team and product has its unique needs and preferences, so do what works for you! We hope this article has given you some insights on some of the decisions made by the iOS team at Grab. We would love to hear about your experience in the comments below.
Happy automating!